")
")
There are three stages during a mission where rappelling can be used by rescuers:
Although recreational climbers rely on rappelling for almost all of their descending, lowering a rescuer has several advantages over rappelling:
Rappelling, however, does have a few advantages over lowering:
Although most people feel more comfortable rappelling than being lowered, in almost all cases (sans poor communication or limited resources) it is more appropriate for rescuers to be lowered than to rappel. That said, rappelling is an important skill.
There are many types of DCDs that can be used for rappelling. These include Rescue 8s (easy to tie off, but large and single purpose), tube-style devices like the Black Diamond ATC (tiny and they can be used for lead belaying), and devices with moving parts like the CMC MPD, Petzl I'D, and brake bar racks.


Rappelling is normally done using single rope technique (SRT), but as with most tasks during a rescue, there should be a backup system in place.
 One option is to create an independent belay using a second rope. This is very appropriate
when learning how to rappel, but the additional gear, time, and complexity rarely
justify the increase in safety during a rescue (unless a rescuer is rappelling with
a patient).
One option is to create an independent belay using a second rope. This is very appropriate
when learning how to rappel, but the additional gear, time, and complexity rarely
justify the increase in safety during a rescue (unless a rescuer is rappelling with
a patient).
 The bottom belay (aka a "fireman's" belay) is a viable option. Pulling on the end
of the rope that exits a DCD will bring the rappeller to a complete stop.
The bottom belay (aka a "fireman's" belay) is a viable option. Pulling on the end
of the rope that exits a DCD will bring the rappeller to a complete stop.
The primary concern with a bottom belay is rock fall. A minor secondary concern is that the first person who rappels will not have a belay.
A final option to belay a rappeller is a "third hand" which incorporates a friction hitch (e.g., a Autoblock, Klemheist, Prusik, etc) on the rope that exits the brake-side of the DCD. If the rescuer becomes incapacitated due to rock fall or other circumstances, the friction hitch will grab the rope and stop his descent.
There are two potential downsides to a third-hand belay. First, it is critical that the friction hitch remains well-dressed so it will grab the rope. Second, the hitch must not be able to touch the DCD which would prevent the hitch from grabbing the rope. You can extend the DCD from your harness as shown here to avoid this possibility.

Unlike a friction hitch that is on the high-tension side of the DCD (where grabbing the hitch may cause it to release), it is safe to grab a friction hitch that is on the brake-side (i.e., low-tension side) of a DCD—squeezing the hitch will provide plenty of friction to stop your descent.

The challenging part of rappelling is going from a standing position, with your weight on your feet, to a seated position, with your weight on your harness.
The higher the anchor point, the easier this transition—you just sit down in your harness. With a waist-high anchor, you can put your feet on the edge and crouch down to get your weight in your harness.
It's significantly more difficult to transition your weight into your harness when the anchor is at ground level. Even if you crouch, you can still drop a foot or two until the rope hits the edge (which may generate significant a fall factor). With a low anchor it's usually best to sit with your legs hanging over the edge ("side-saddle") and gracefully, or not, turn toward the wall so you can ease your weight onto the rope.
When going over the edge, it's also important to resist the temptation to grab the rope above your DCD and release the rope in your brake hand.
While rappelling:
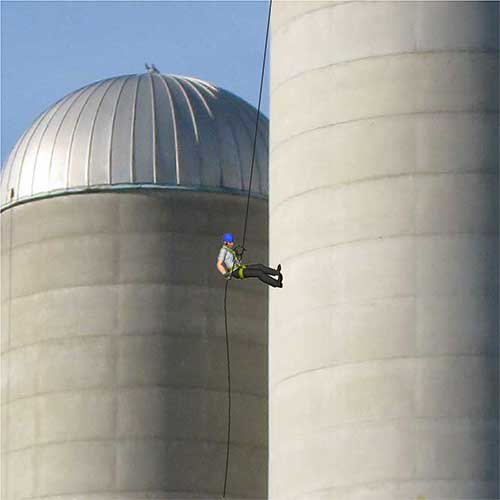
To pass an overhang, keep your feet on the lip and continue to rappel until your head is below the lip, so you don't smack your face into the wall.
(You can click on this picture to see a more vertically-interesting image.)
To avoid rappelling off the end of your rope, which happens more frequently than you might expect, consider tying a stopper knot in the end of the rope(s). It only takes a moment to tie a double overhand stopper, an overhand skeleton, or a figure 8 skeleton in the end of a rope—it might save your life.
The downside of stopper knots is they can get stuck in rocks when you are trying to retrieve the rope. A reasonable rule-of-thumb is to tie a stopper knot if there is any possibility that the rope will not reach a safe landing zone.
During egress, you can rappel down on two strands of rope that are wrapped around an object. When you are safely on the ground you can pull the rope down (after making sure any stopper knots are untied).
The last person to rappel should ensure that the rope is not caught on the anchor. If two ropes were joined with a bend, make a mental note of which rope should be pulled so the bend doesn't get stuck on the anchor.


 The "critical point test" (aka "scissors test") requires that if any one item fails, nobody should be injured.
 A "bend" is a knot that joins two ropes.

 A "hitch" is a type of knot that must be tied around another object.
 The "whistle test" requires that if all rescuers let go, nobody should be injured.
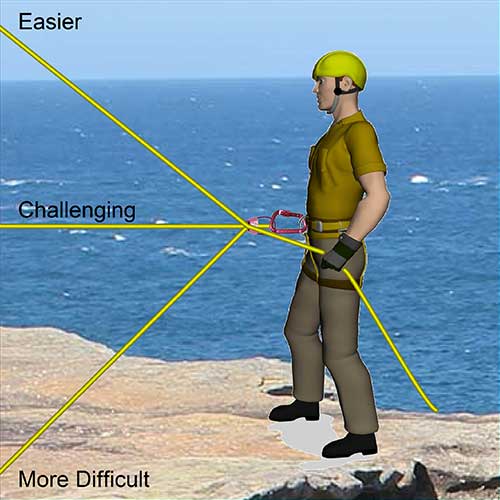